Supplies Needed
A witch hat template. You can draw out your own, or use mine here.
A glue gun and glue sticks.
A stapler.
Felt in the color of your choice.
Needle and thread in the same color as your felt.
Scissors
Black paper (optional)
Stuffing -batting, old newspaper or scrap felt works too.
Step 1
Begin by cutting out the triangle and the circle shape of your template. I used white paper because it's easier for you to see how I am using the paper, but black paper works nicely too and can give you a more seamless look.Use your template to cut out the two shapes of your felt. Save your triangle template cut-out. We are going to use this as support for our hat.
Step 2
Here I took my cut-out triangle template and made a cone shape. This is going to be the point of our witches hat.
Staple the cone at the base. The cone doesn't have to line up perfectly, this is just serving as a base for our felt.
Step 3
Line-up your template with your cut-out, triangle felt piece and cut-off any extra paper that is at the base of your cone.
I know that I want my witches hat to have a slight bend at the tip, so I roughed up the tip of my template a bit.
Step 4
Add a line of glue down the center of your felt and place your paper cone template on the glued felt. Wrap and glue the felt around your paper cone and add more glue as needed.
Your hat should look something like this. Cut away any extra fabric or paper. Don't worry too much about open seams at this point.
Step 5
Make four small half to one inch slits around the base of your cone. Cut through the paper and the felt.
Your cone should now look something like this.
Step 6
Now take your circle felt shape and fold it over into a taco shape. Cut a very small hole in the center. This is going to be the base or rim of your witch hat. *Tip* make the hole small! You can always go larger later. This is where we will attach the cone to the base and we want a very tight fit.
Your felt circle or hat base should look something like this.
Step 7
Take the felt circle you just cut and place it over the top of your felt cone (through the opening you just made).
Your hat should look something like this.
If the fabric of your cone is wrinkling, cut a slightly bigger hole into your circle felt.
Step 8
This is what the under side of my hat looks like. I am going to tear away any excess paper and then glue the flaps of the felt to the underside of my hat. Don't worry if you remove the staple. It's no longer needed anyways.
Now I will glue the flaps the under side of my hat.
Step 9
Next take your needle and thread and sew the very tip of the hat closed. Then wrap the thread around the tip of the hat and secure it every few rounds with the needle. You can also just sew the seam closed if you wish. I just liked the extra texture of all the string. Just make sure to secure the string to the hat often.
Step 10
If you want a bent tip to your hat, just simply bend the tip over and secure it to the hat with needle and thread.Your hat should look something like this.
If your hat needs more support, stuff the cone with batting, newspaper or scrap felt.
Step 11
I like to rough-up the edges of the hat by simply pulling on the edges of the felt with my fingers. This gives it a rough-up look.
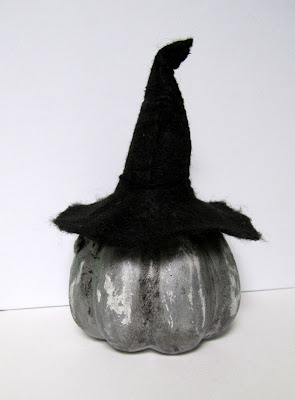
You have just created a felt witch's hat!


